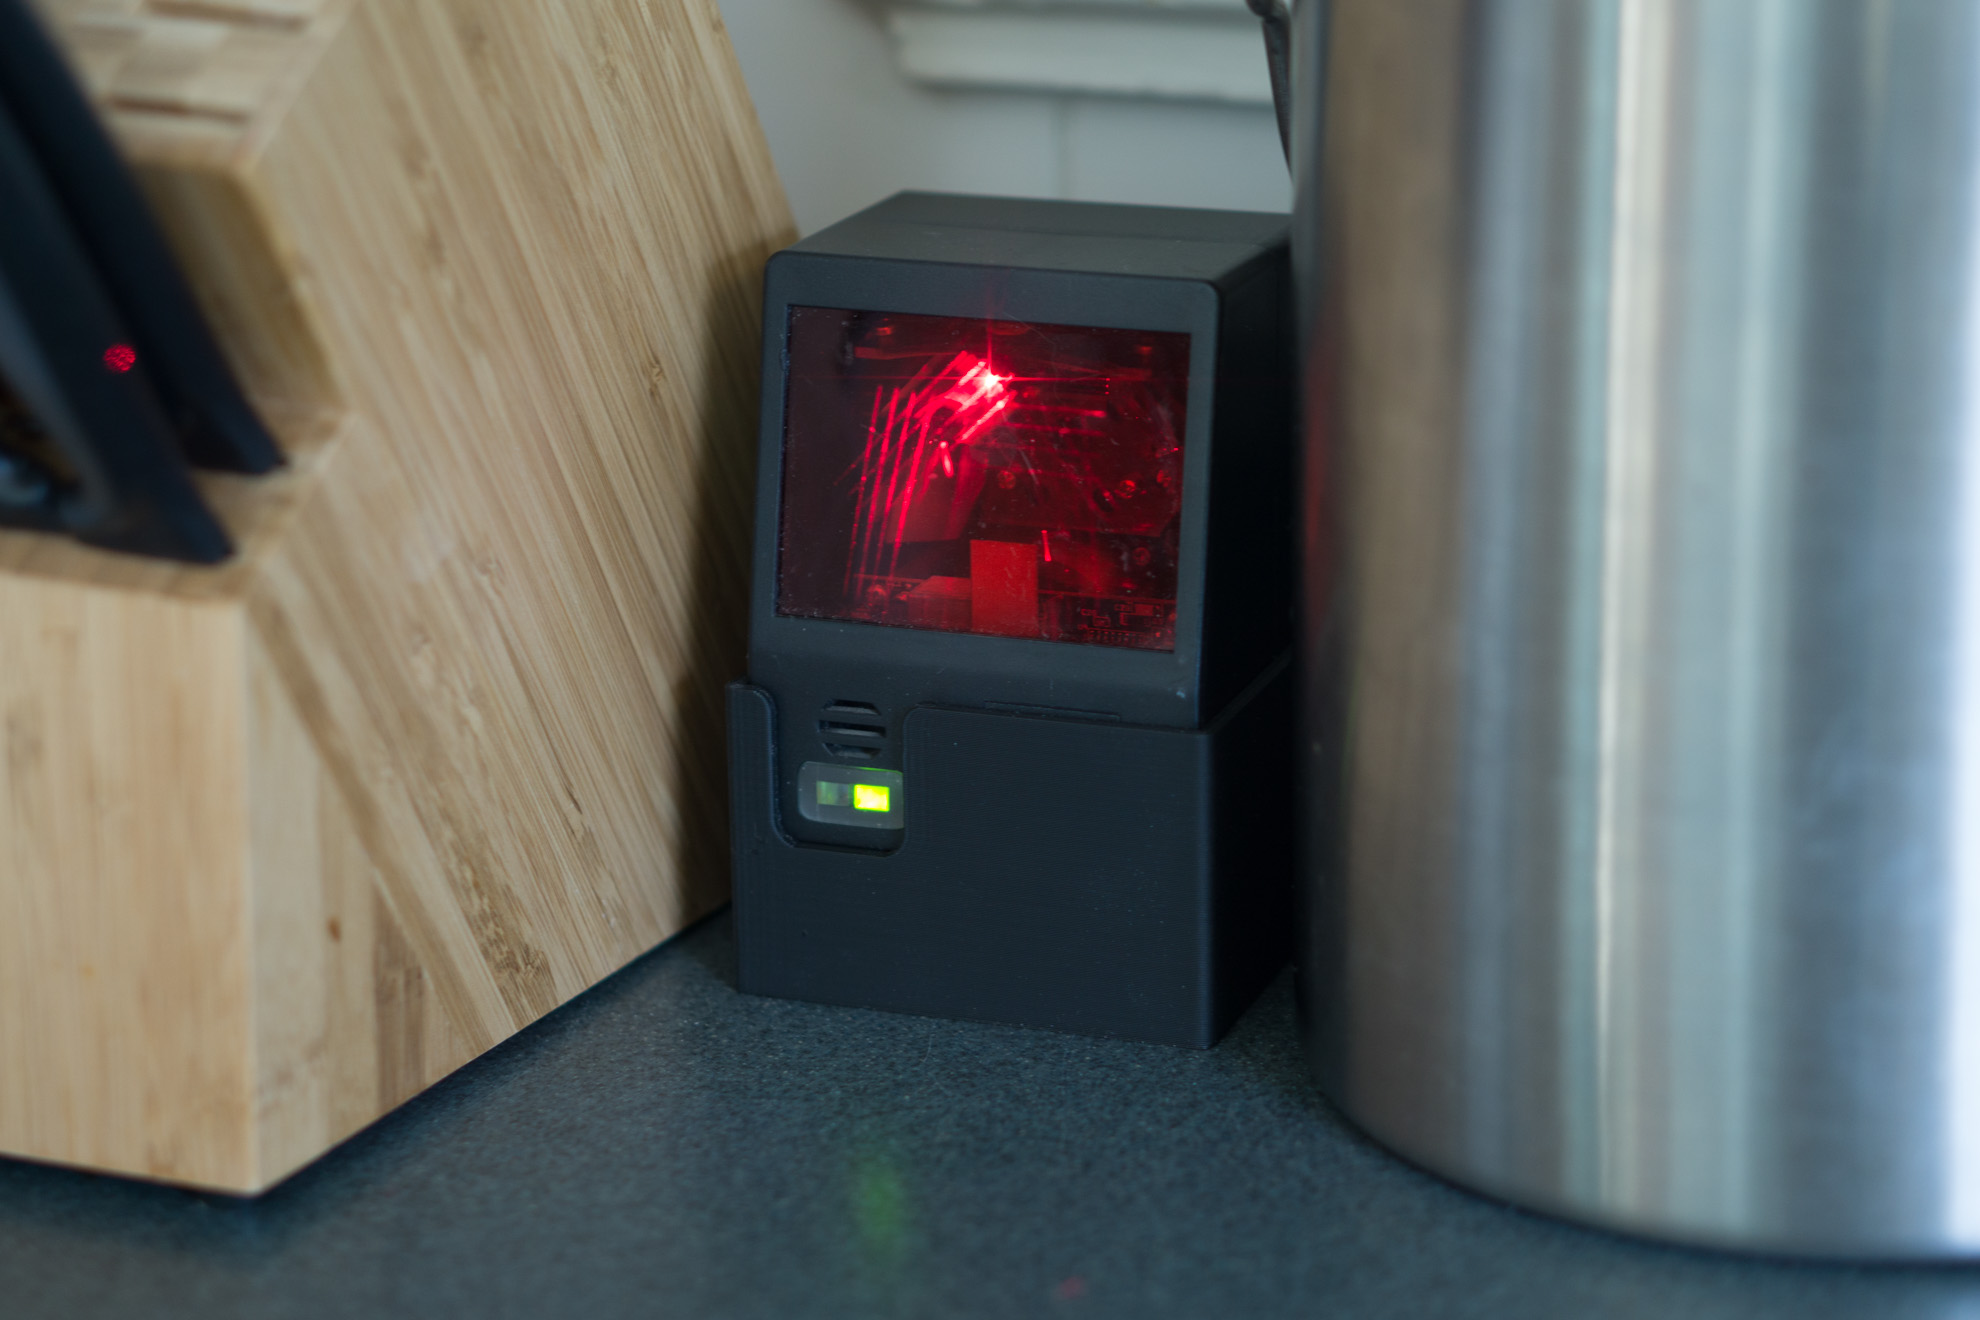
I didn’t actually plan this project, but rather it found me. I was at the Scrap Exchange, a local reuse center, when I found a very nice looking scanner that you might find at a grocery store kiosk. It had been ripped from its connectors and had unlabeled wires hanging from it; a bit of hardware gore if such a thing exists. It was labelled on sale for $6.25, and a quick search revealed that it originally retailed at over $500. I thought a great use of this would be to keep near our pantry so that when we are out of a spice or snack, we could just scan the item and it would get posted to our shopping list. I figured I would try to reverse engineer it, and if all else fails, scrap it for the laser and motor. This is a longer post that goes through the entire process, so strap in!
Reverse Engineering
I was able to locate the datasheet for the scanner and find that it uses an RS232 serial connection to send data, and that normally there would be a DB9 connector where the frayed ends were. Having no wiring diagram, I had to start by finding the power connections.
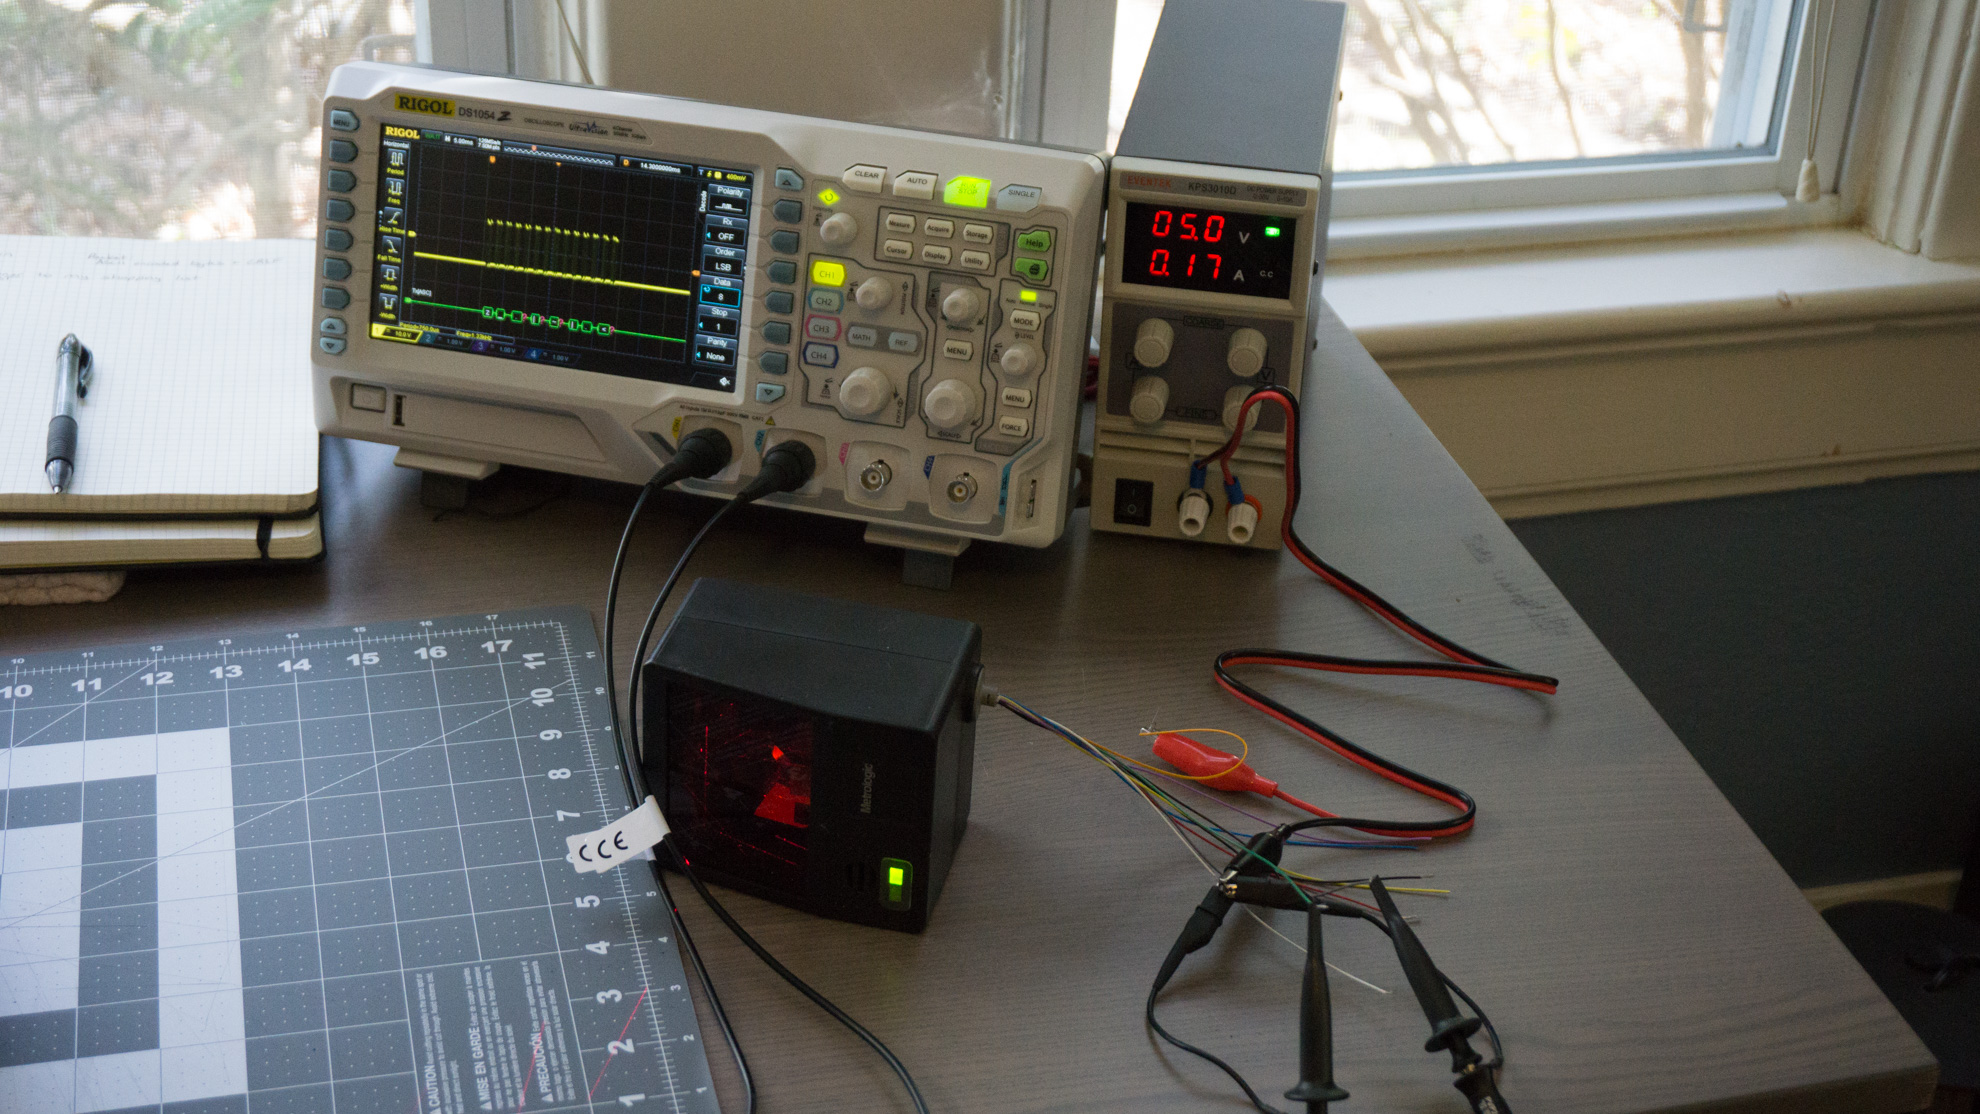
This part of reverse engineering is really more luck than anything. You run the risk of frying your part when you connect the power improperly. I set my power supply for 5V and tried the following things to find the power cables:
- Using the BBROYGBVGW color scheme used for resistors to match wires to their DB9 pinouts. This did not work.
- Start trying wires based on likely color codes; for instance black and brown for ground, and red or orange for power. This wound up working, though who knows if it was for any of the logic that I thought. It turned out that orange was the 5V line and brown was ground.
Now that the part was powered and working, all that was left was finding the RS232 transmit line. I used my oscilloscope to do this part and found it by scanning items and looking for the signal. It was not long before this wire was found and I was able to receive UPC codes. The scanner simply sends the ASCII representation of the UPC code followed by the \r\n characters. This would make parsing the messages easy.
Posting to Wunderlist
My wife and I use Wunderlist for our grocery shopping, so the next step for this project was to figure out how to post the item information to a shared grocery list. This consists of two parts: converting the UPC number to an item name, such as “16 Oz Almonds” and then making a request to Wunderlist with this information.
UPC Lookup
For UPC lookup, the UPC Database looked like the best choice since its free tier would work for a low lookup count and because you can add your own UPC labels for items they don’t have. The service is also very easy to use; simply sign up for an account, and then you can search using the following URL scheme:
GET https://api.upcdatabase.org/product/:upc_code/:api_token
This will return a product or an error if none could be found.
Wunderlist Post
Next up was posting to Wunderlist. As with above, our first step is getting an API token. This can be done right in their developer web interface by creating a new application to use with Wunderlist and then creating an OAuth 2 token for your own account. Once you have an OAuth2 token and a client ID for your application, you can start making requests.
In order to create an item, we first need to find the ID of the list that the item will be added to. We can do this using the following API point:
GET https://a.wunderlist.com/api/v1/lists
  X-Access-Token: <your access token>
  X-Client-Id: <your client id>
This returns a list of lists, at which point you can find the one you want by searching through the results looking for the desired title. Grab the ID of the desired list, and then posts can be made using:
POST https://a.wunderlist.com/api/v1/tasks
  X-Access-Token: <your access token>
  X-Client-Id: <your client id>
  Body: {
	   "list_id": <id from the last step>,
	   "title": "<title from UPC lookup>"
  }
Feeding our Pi
To tie this all together, we need a program that does the following:
- Listens for UPC codes coming over the Serial connection.
- Upon receipt of a UPC code, query the UPC database as shown above.
- Once a product name (or error) is determined, post this to Wunderlist.
While we could have potentially used a Particle or other low-power embedded device, I wanted to try out Elixir’s Nerves project, a way to write embedded software using Elixir. So, a Raspberry Pi Zero W was chosen as the compute module so that the scanner could be placed anywhere in the house and still connect.
Building the Hardware
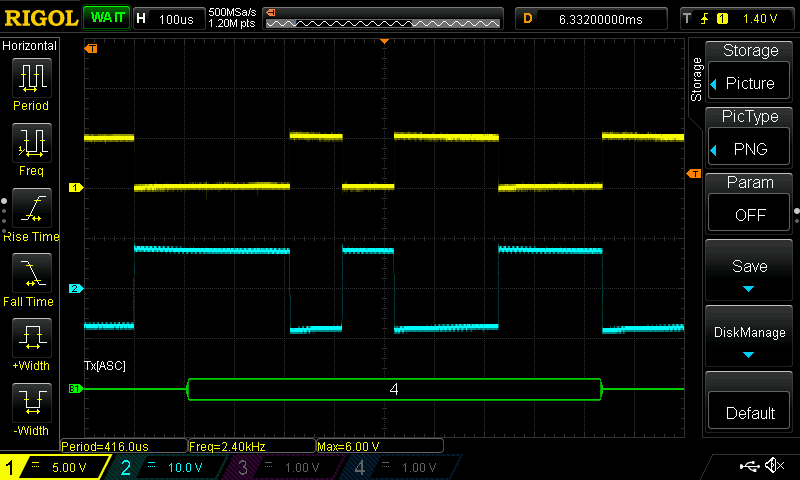
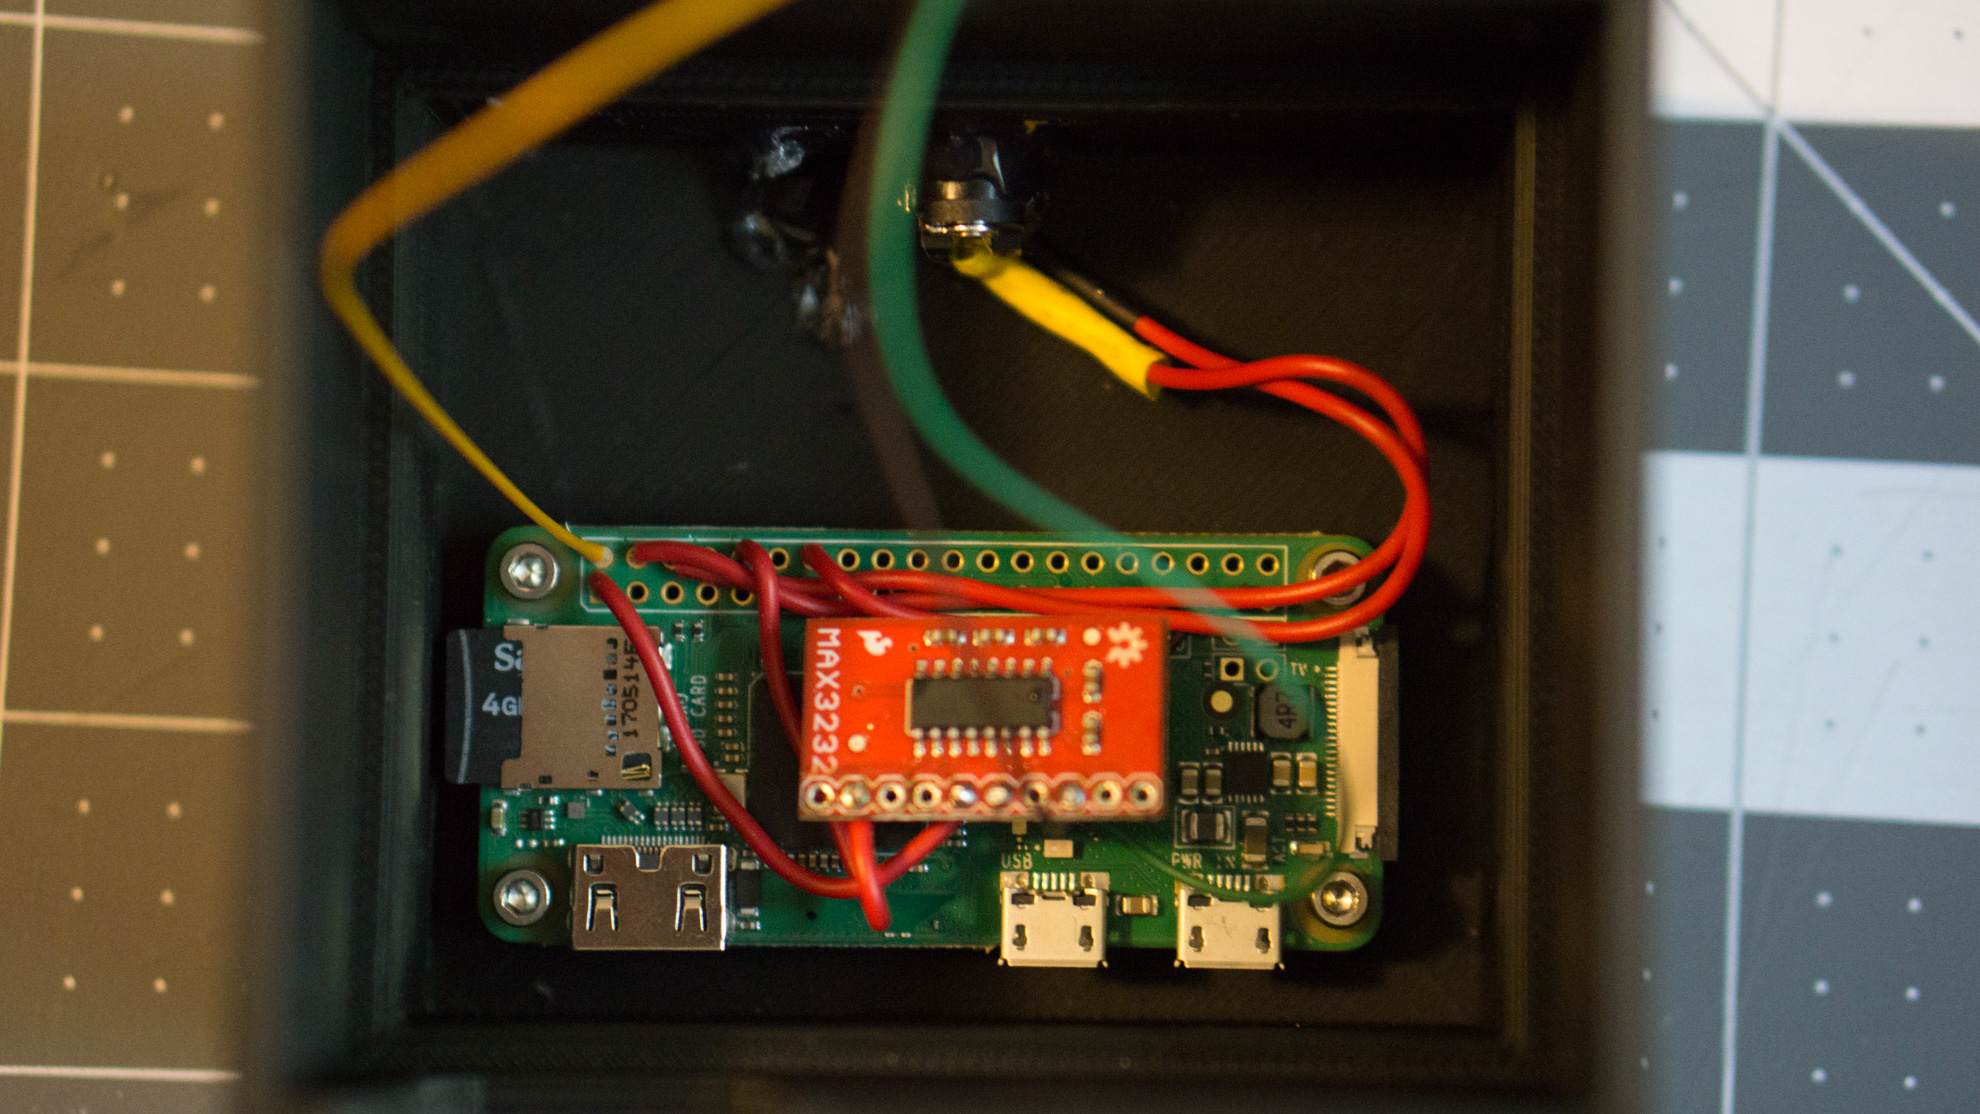
The hardware for this project was pretty simple: we feed 5V in through a barrel connector to the scanner and Raspberry Pi, then connect the Raspberry Pi to an MAX3232 level converter for the serial line conversion. This needs to happen because RS232 uses different voltages than the Raspberry Pi for its serial communication; see the oscilloscope screenshot below for the 3.3V serial signal versus the RS232 signal:
Writing the Software
The software side and working with Nerves in general I think deserves its own post. For this article, lets do a high level overview of the project and code. First, the code can be found at the following link:
I will talk about the code in three sections: the project level, the supporting code, and the main loop.
Project Level
The project level is where we import the required libraries, setup system variables, and tell Nerves how to build our software. Unlike working with the standard Raspberry Pi environment with Raspbian and Python/C/C++ where you flash an operating system on your Raspberry Pi and then copy your program files over, Nerves builds a root image that boots into your application. You can even set your project up to allow SSH firmware pushes, allowing you to compile everything on your PC and push a new copy of the entire root system over SSH to your device. This takes all of the manual Raspberry Pi configuration out of the picture; all of the sudo raspi-config commands, wpa_supplicant.conf placement, and manually changing files to set up your pi is replaced by the Nerves configuration. This is wonderful for setting up a new Raspberry Pi to run your application.
One of my other favorite things about working with Nerves has been how you can feed your secrets into the software at compile time using the config files. Consider the following, where we pass in our API keys using environmental variables on the computer that is compiling the code:
config :nerves_network, :default, wlan0: [
    ssid: System.get_env("NERVES_NETWORK_SSID"),
    psk: System.get_env("NERVES_NETWORK_PSK"),
    key_mgmt: String.to_atom(key_mgmt)
  ]

config :scanner,
  wunderlist_access_key: System.get_env("WUNDERLIST_ACCESS_KEY"),
  wunderlist_client_id: System.get_env("WUNDERLIST_CLIENT_ID"),
  upcdatabase_access_key: System.get_env("UPCDATABASE_ACCESS_KEY"),
  list_name: "Scanned Groceries"
In a normal Raspberry Pi project running Raspbian and your language of choice, you would likely need to manually SSH in and send the keys or manually type them in using the keyboard. With Nerves, simply compile them in and flash your image. Done.
Supporting Code
What I call the supporting code is simply some high level APIs written to abstract the UPC database queries and Wunderlist interactions. I used HTTPoison to make the requests and Poison to decode the JSON. As an example, the below code shows a request to find the ID of a list on Wunderlist given the title of the list.
def find_list_id(title) do
  "https://a.wunderlist.com/api/v1/lists"
  |> HTTPoison.get(auth_headers())
  |> process_response(title)
end

def process_response({:ok, %HTTPoison.Response{body: body}}, title) do
  Poison.decode!(body)
  |> Enum.find(%{}, fn list_item -> Map.get(list_item, "title") == title end)
  |> Map.fetch("id")
end

def process_response(error, _), do: error

defp auth_headers() do
  [
    "X-Access-Token": Application.get_env(:scanner, :wunderlist_access_key),
    "X-Client-Id": Application.get_env(:scanner, :wunderlist_client_id)
  ]
end
In Elixir, it is idiomatic to return a tuple or error code instead of raising errors. Thus, this API returns one of three ways:
{:ok, <id>}{:error, %HTTPoison.Error{}}:error
This lets us match on the return in the calling code, making handling errors a natural part of program writing.
response = Application.get_env(:scanner, :list_name)
  |> Scanner.WunderlistApi.find_list_id()

case response do
  {:ok, id} -> id
  {:error, error} ->
    Logger.error error.reason
    nil
  :error ->
    Logger.error "Key not found"
    nil
end
Main Loop
Unlike a while loop or for loop in other languages, Elixir and Erlang use processes which are supervised by the system for very high levels of system robustness. If a piece of python code crashes, the application will exit and you will likely need your operating system to restart it. If an Elixir process crashes, the supervisor will automatically restart the relevant processes without OS intervention. This makes the style of writing programs very different, but its a style I’ve grown to really enjoy.
For our main loop, we will be using Elixir’s GenServer behavior to implement the steps shown above in the “Feeding Our Pi” section. We start by initializing our serial port, HTTP client, and polling to see if the internet has connected yet.
def init(port) do
  #Start the NERVES port
  begin_serial(port)

  # Start httpoison
  HTTPoison.start()

  # Start polling for the ethernet being available
  send(self(), :ethernet_check)

  {:ok, %{ id: nil }}
end

defp begin_serial(port) do
  {:ok, pid} = Nerves.UART.start_link
  Nerves.UART.open(pid, port, speed: 9600, active: true)
  Nerves.UART.configure(pid, framing: {Nerves.UART.Framing.Line, separator: "\r\n"})

  pid
end
Starting the serial port in active mode will cause it to send a message every time it receives a string. We can setup a callback on our GenServer that fires every time we receive data. This is where we can write the code to query the UPC code and post to Wunderlist.
def handle_info({:nerves_uart, _pid, barcode}, %{id: id}) do
  # Check the barcode
  todo_title = case Scanner.UpcDatabaseApi.lookup(barcode) do
    {:ok, product_map} -> get_best_name(product_map, barcode)
    _ -> "Barcode error: #{barcode}"
  end

  # Post the item
  Scanner.WunderlistApi.create_todo(id, todo_title)
  Logger.info "Got info: #{barcode}. Posted item: #{todo_title}"

  # Keep the state constant
  {:noreply, %{ id: id }}
end
As can be seen here, if there are any problems during the UPC retrieval, we simply post a “Barcode error:
Project Enclosure
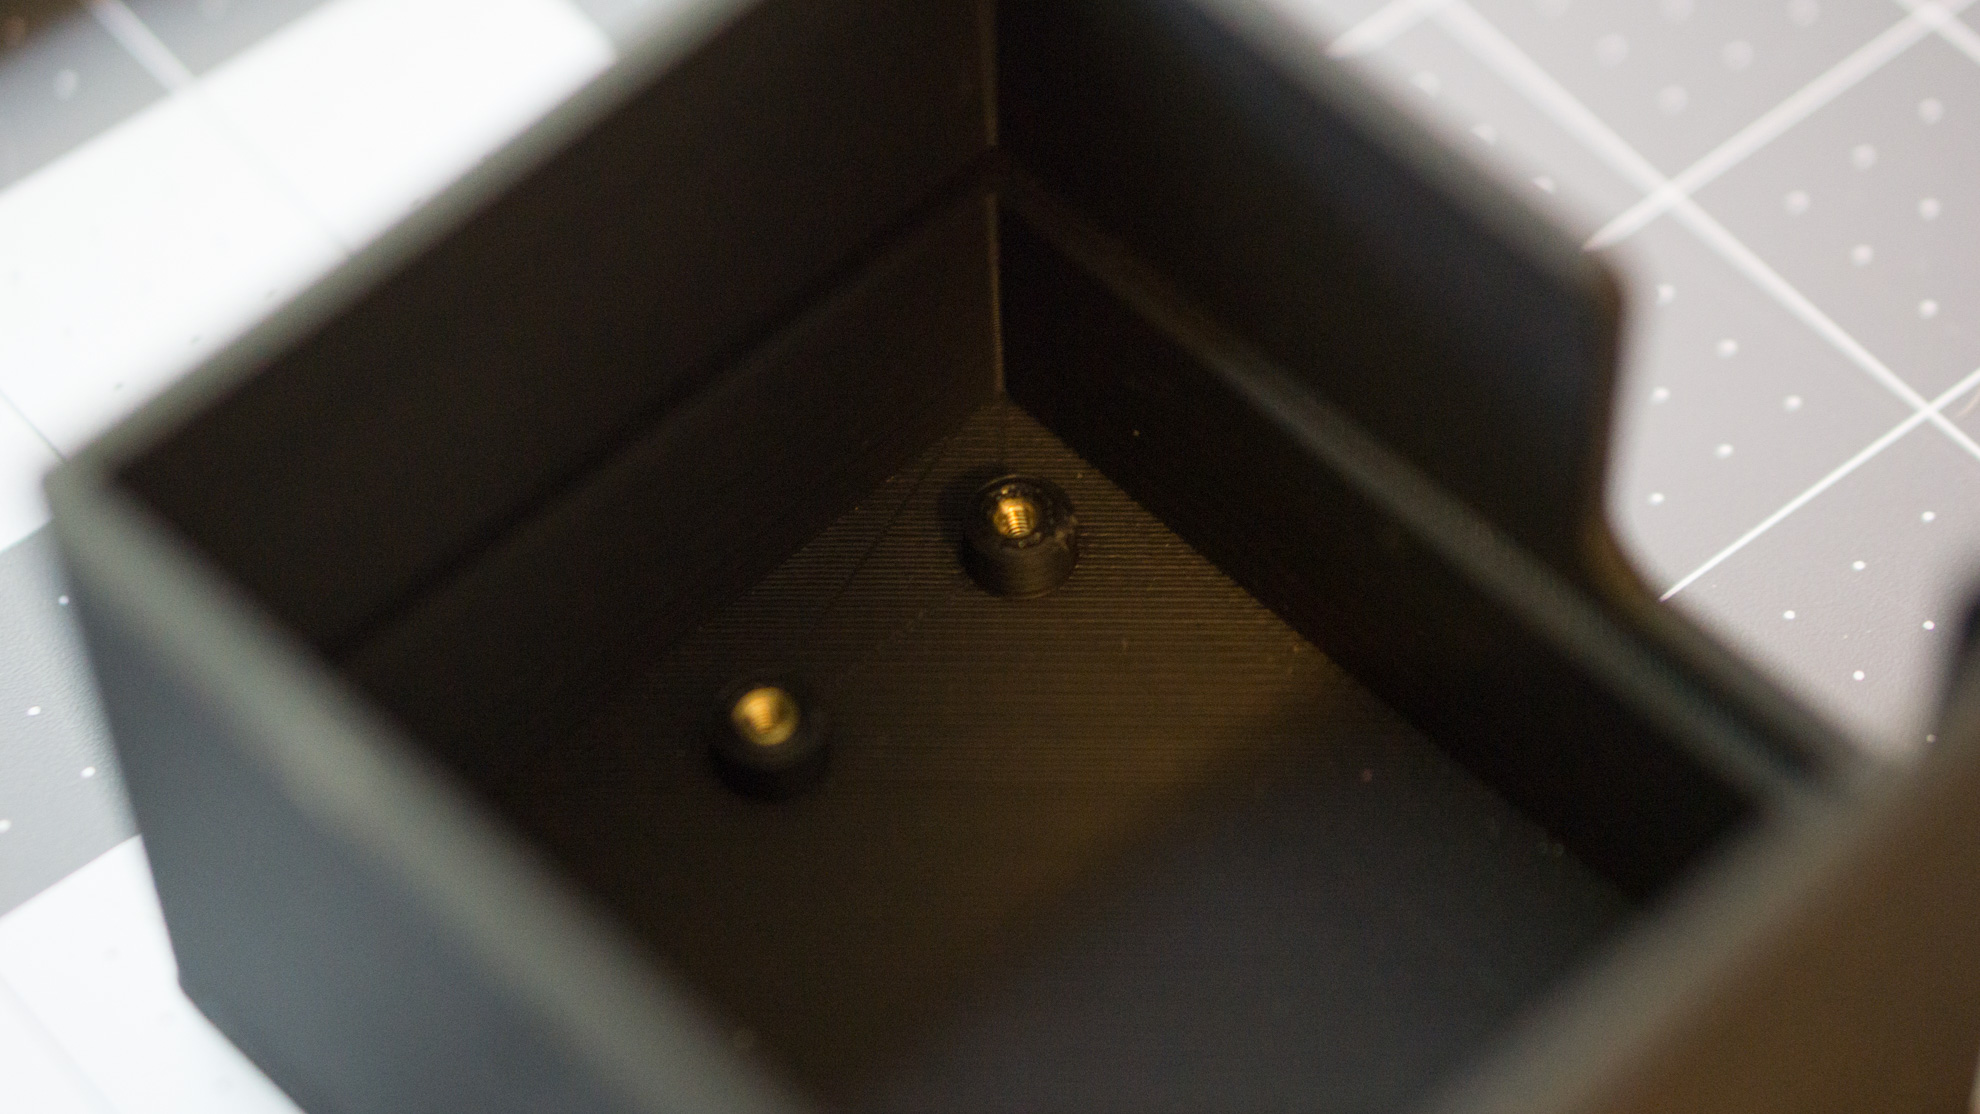
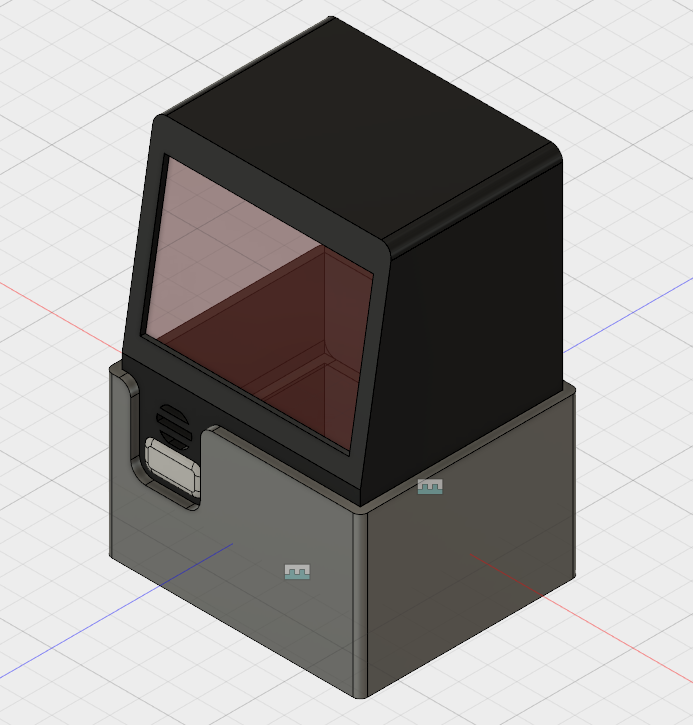
While I’ve printed some simple 3D designs before, this was my first one with features that held multiple parts together in an assembly. I used Fusion 360 for my modeling, and began by modeling all of the individual components or finding the common ones like the Raspberry Pi online. From there, I moved the components around until they had ample space to be wired and then figured out how to secure them in place. The Raspberry Pi is screwed into some posts using heat-set inserts.
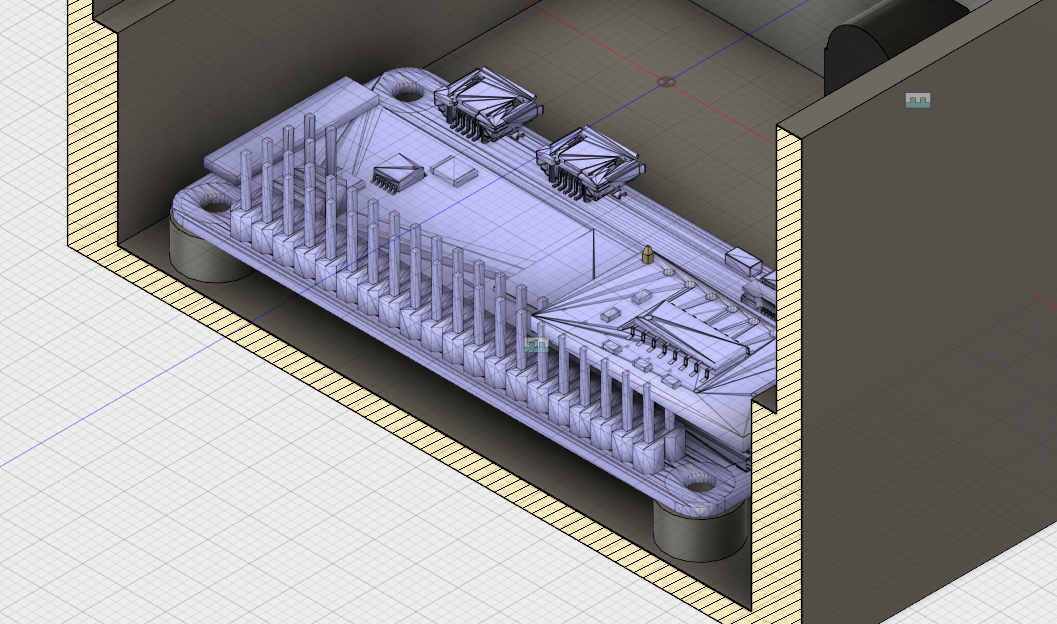
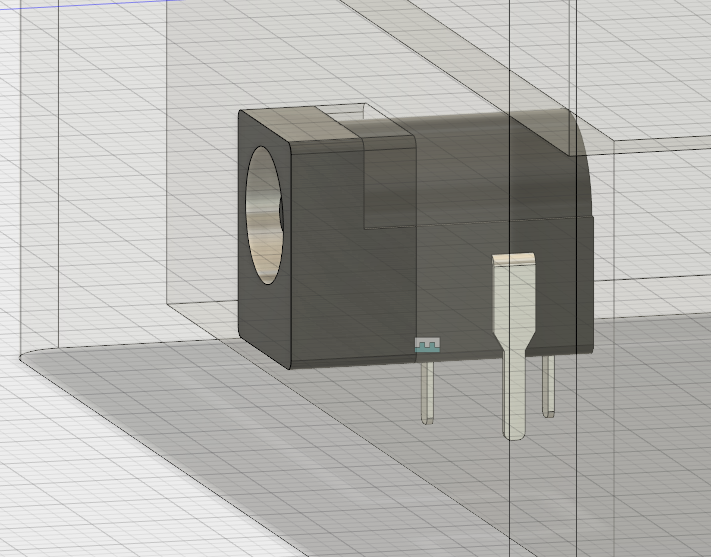
The power connector has a very small clearance and will simply be glued in place:
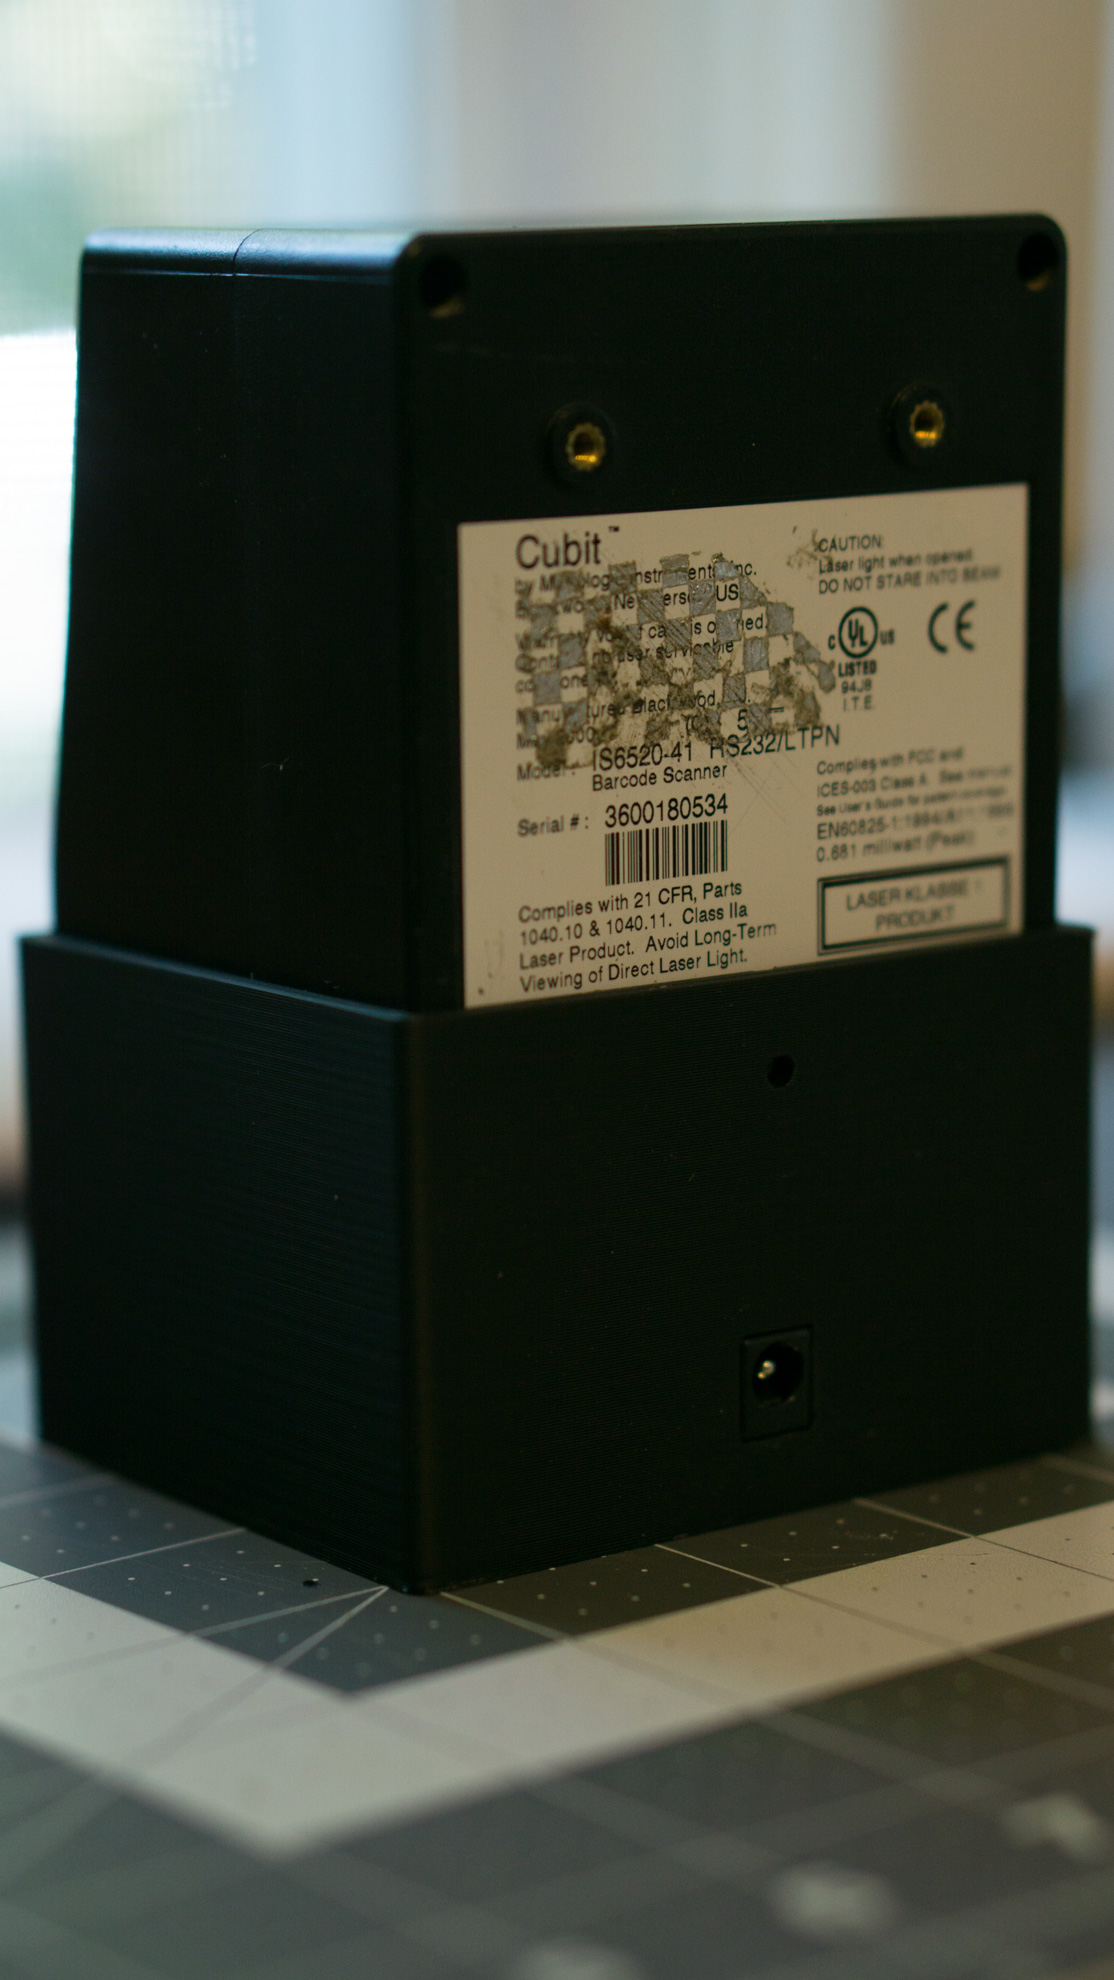
The scanner itself sits on an inner wall and is held in place by the outer wall. It is high enough up that the cavity beneath it can easily fit all of the wires.
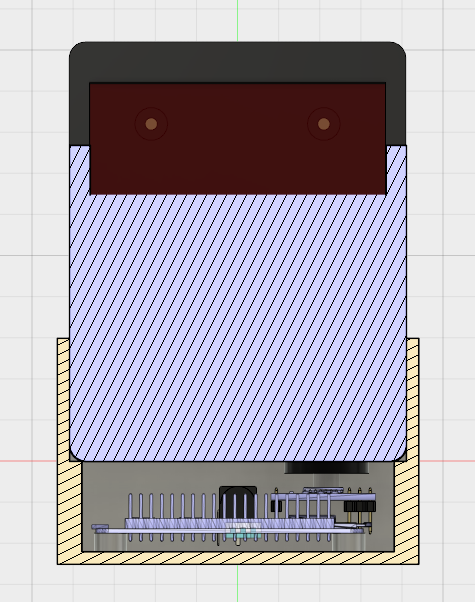
The whole thing includes some fillets and cutouts to neatly display the scanner:
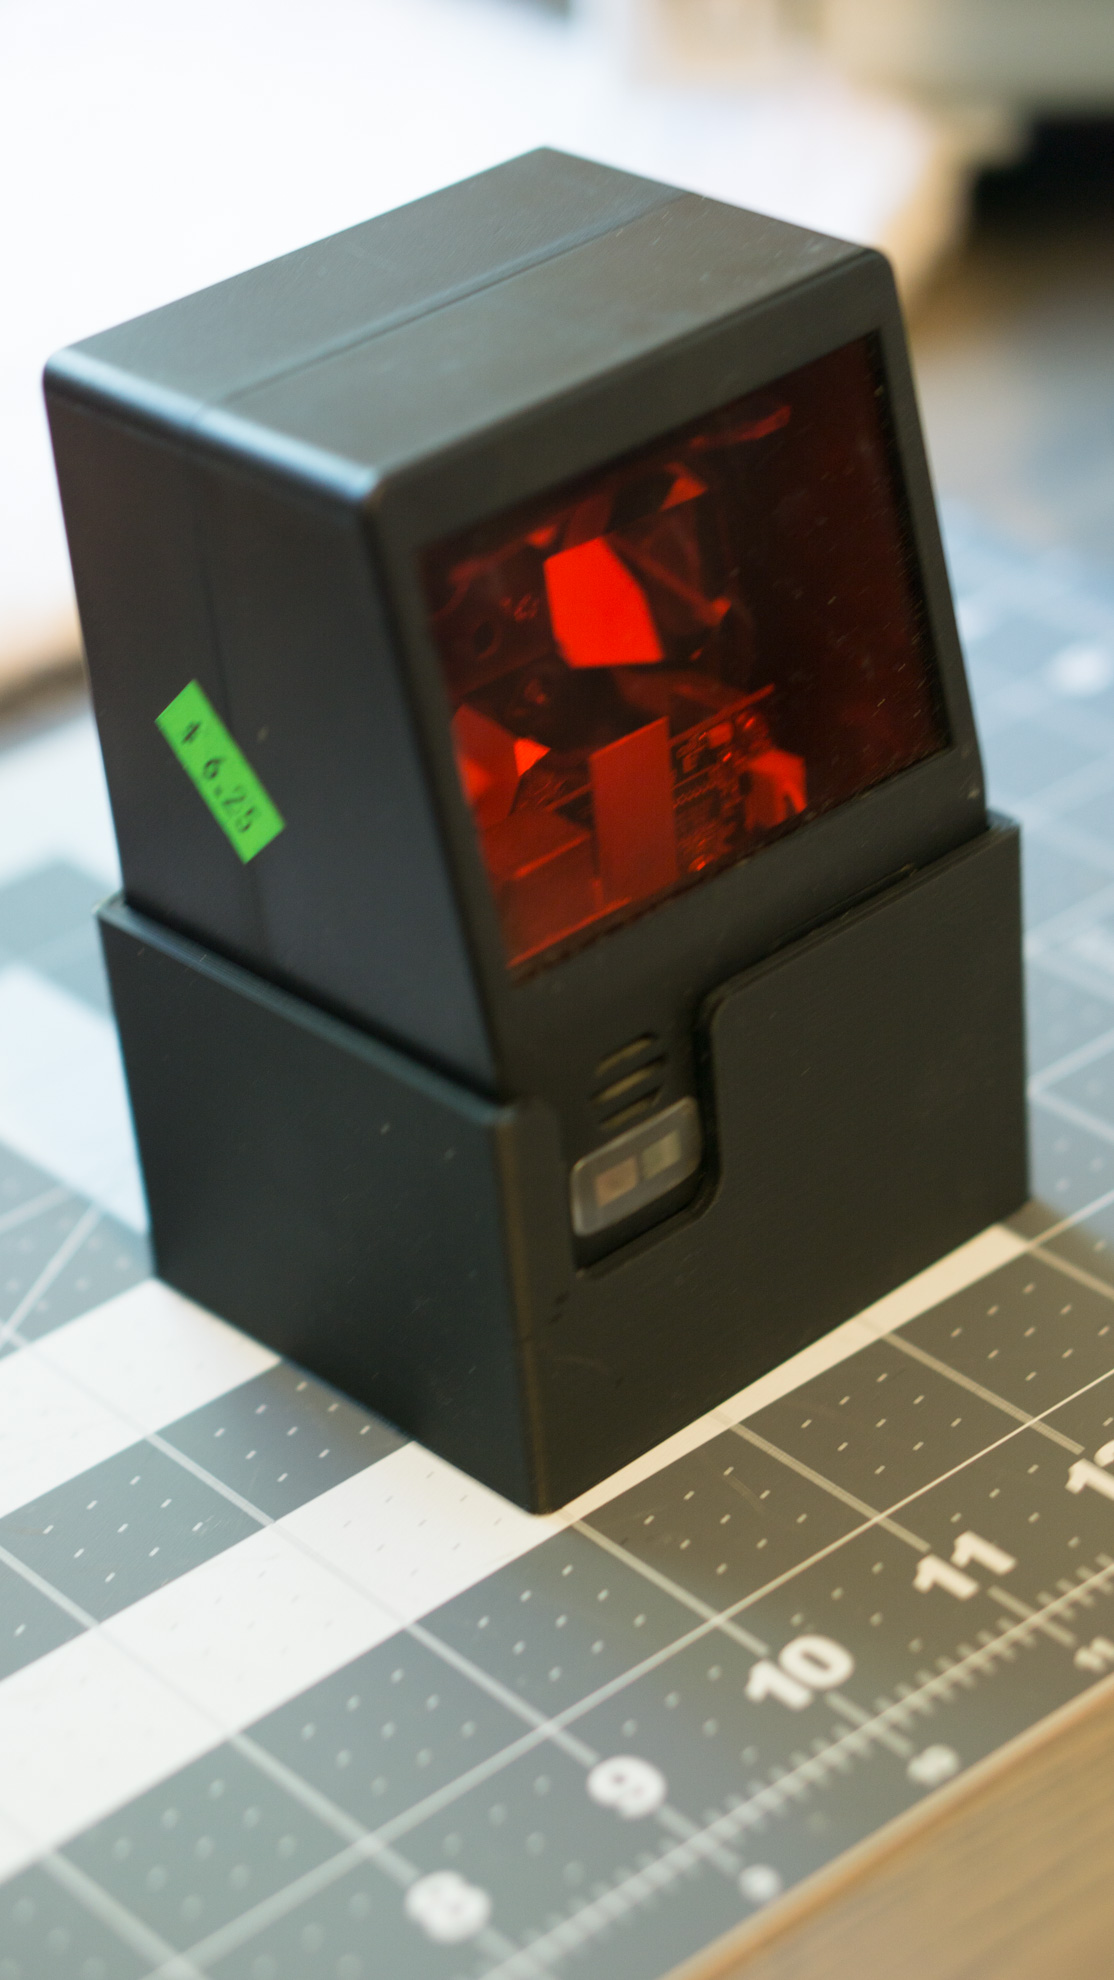
Not having a 3D Printer myself, I went on 3D Hubs to get this design printed. The final result looks great and was just $11!
Summary
This was a fun project where I got to learn more about Nerves and designing 3D printed enclosures. It was also inexpensive, with the parts list totaling less than $40 for a very complex design. It is unlikely that others will find this particular scanner, but it should be possible to use any scanner with a serial protocol. The device has already come in handy several times to remind us to pick up more spices that we have run out of. I hope you enjoyed this post, and as always feel free to contact me with any questions you have if you are looking to build something similar!
If your company could use help launching an embedded product like this, I run a full-stack connected device consulting firm that builds great products for clients. For more information, please check out my Services page.